Little Monster Getting Started Guide
Apex EVO 2-inch • MicoAir H743 AIO • DJI O4 Wide • Happymodel EP1 ELRS • M100 GPS • 3S–4S
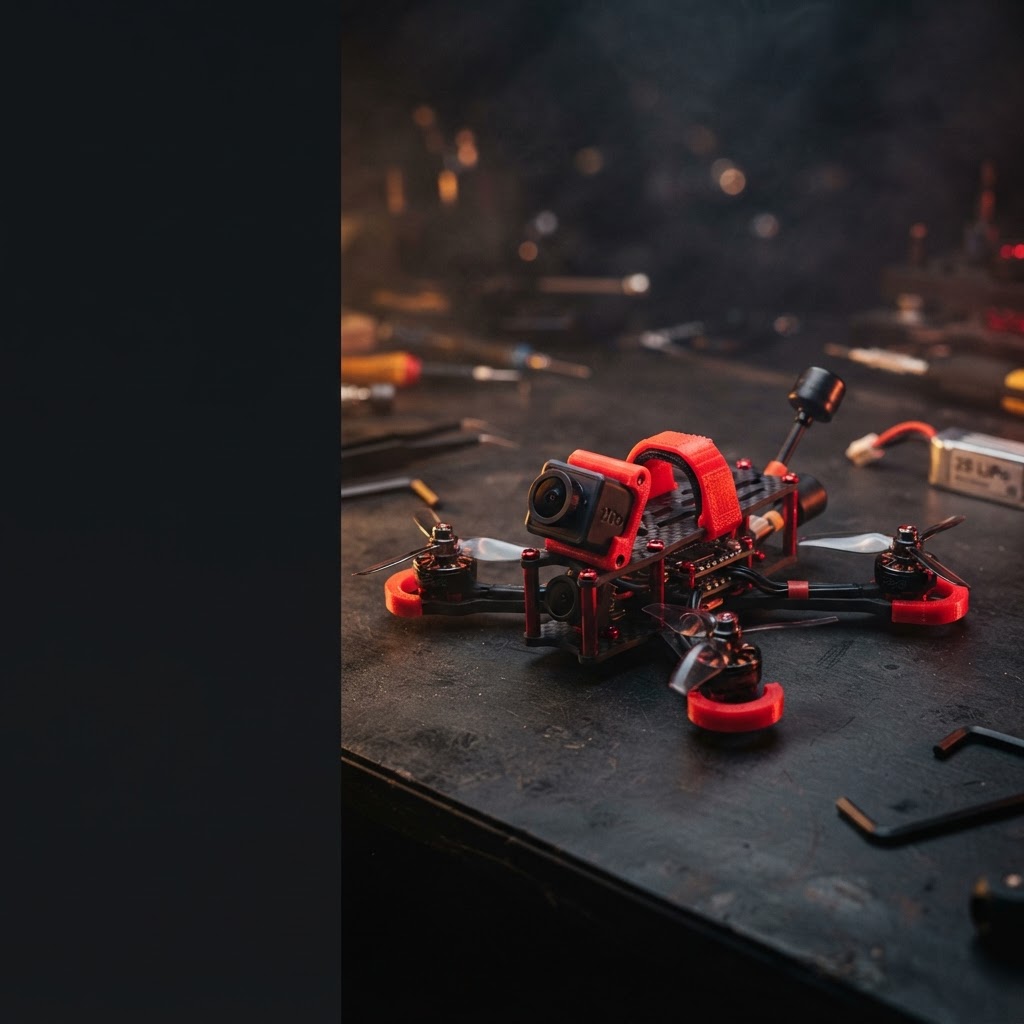
1. Meet your build
Apex EVO 2-inch frame • MicoAir H743 AIO flight controller/ESC • DJI O4 Wide Air Unit • Happymodel EP1 ExpressLRS 2.4GHz receiver with ceramic antenna • M100 GPS • custom TPU parts • 100% custom built and tuned.
Battery compatibility is 3S–4S LiPo, and the motors are HGLRC 1303.5 5500KV, both confirmed by the builder. Order spares and propellers against those exact numbers.
This is an open-prop FPV aircraft. Its small size does not make powered bench work safe, and small props can still cut. This guide does not establish that GPS Rescue, self-leveling, altitude hold or position hold is configured on your particular aircraft.
Fly Gear Swap • Owner guide • 31 October 2026
2. Before connecting power
Disconnect the battery and remove every propeller. Keep them off throughout configuration, binding and motor checks. Photograph each prop's position before removal, but verify actual motor rotation and prop type before refitting: a photo alone cannot prove correct rotation.
Inspect the carbon plates and arms, screws, motor mounts, wiring, solder joints and connectors. Check that no wire or battery lead can enter a propeller arc. Check that the TPU mounts, GPS module, camera and the EP1 receiver are secure. Do not open electronics or disturb wiring simply to follow this guide.
Set the radio's throttle fully down and the arm switch to its disarmed position. Keep fingers, tools and loose hardware away from the motors. If a connector, wire, motor or board appears damaged, stop and ask the builder.
What you need
- A radio or external module that supports ExpressLRS 2.4GHz, with a suitable model profile and a charged transmitter battery.
- Compatible DJI goggles and a USB data cable for the flight controller.
- A suitable 3S or 4S LiPo that matches the fitted connector, polarity and the space on the frame.
- A small fan for powered bench sessions; the O4 air unit needs airflow when it is running.
3. Preserve the custom tune
Start with inspection and backup, not a firmware flash. Ask the builder for the handover configuration, firmware version and exact target, rates, modes, motor order and direction, and failsafe details.
If the installed firmware is Betaflight, use a compatible Betaflight app/configurator. Connect by USB with the flight battery disconnected initially. Record the detected board target and firmware version. Save the CLI output of “diff all” and, for a fuller record, “dump all” to dated text files. Capture Ports, Receiver, Modes, Motors, OSD, power/battery and tune settings. Preserve your radio's model settings separately.
Do not restore an old configuration blindly across firmware versions. Do not flash a target guessed from “H743”, replace the custom tune with a preset, or alter ESC firmware as a first troubleshooting step. This aircraft was built and tuned for one specific hardware combination.
Betaflight CLI reference: betaflight.com/docs/wiki/guides/current/Cli
4. Choose and check the battery
Use a suitable 3S–4S LiPo as confirmed by the builder. Recommended capacity, connector, polarity, discharge rating and physical dimensions are not specified here: confirm them with the builder before buying packs, and do not choose a pack solely because the plug fits.
Before connecting, confirm polarity, pack condition and cell count. Use a balance charger set for the pack's chemistry and cell count, and follow the battery and charger instructions. Do not charge a swollen, damaged or suspect pack, and never leave charging unattended.
Secure the pack so it cannot slide into the props or strain the connector. Keep balance and power leads clear of rotating parts. Confirm voltage and cell-count readings and any warnings in the flight controller and OSD before flying. No flight-time estimate is supplied: make the first flight short and monitor the pack.
5. Bind the EP1 ELRS control link
This build uses a Happymodel EP1 ExpressLRS receiver on 2.4GHz with an integrated ceramic antenna. It handles flight controls only; the DJI goggles handle video. A clear picture does not prove the radio can control the quad.
Know what is installed
Confirm the receiver's ExpressLRS firmware major version before changing anything. ExpressLRS requires matching major versions between transmitter and receiver: for example 3.x with 3.x. Do not flash working equipment simply to get started, and record the versions you find.
Binding checklist
- Select the correct radio model and enable its ExpressLRS 2.4GHz module using the radio or module instructions.
- Choose one binding method and follow the official ExpressLRS guide for your installed version: either the same unique binding phrase on both devices, or the receiver's bind button and the transmitter's bind action. The procedure changed in 3.4, so match the instructions to your actual firmware.
- Keep props off and power the aircraft normally. Confirm the receiver connects, then check real channel movement in the flight controller. A receiver LED alone is not enough.
- If the receiver appears linked but controls stay blocked, check Model Match and the selected model number on your radio.
About the ceramic antenna
The EP1 ceramic antenna version has no external antenna to attach or replace, which keeps the build compact and crash-tolerant. Fit the receiver so the ceramic antenna element is not buried under carbon, wiring or the battery, and do not cover it with tape or TPU. A ceramic antenna gives up some range compared with an external antenna: keep the first flights close and in clear line of sight rather than testing range.
Confirm the controls
In the configurator's Receiver tab, move one control at a time. Roll, pitch, yaw and throttle must move their named channels in the intended direction. Check the arm switch and every mode switch. Resolve any channel mapping or reversed-control problem before arming. Preserve the working receiver port, UART assignment and wiring.
Official ExpressLRS binding guide: expresslrs.org/quick-start/binding/
EP1 receiver information: happymodel.cn — EP1 ELRS 2.4GHz receiver
Write down your setup
Radio and model: ______________________________ ELRS TX / RX versions: _________________________ Arm switch and disarmed position: _______________ Mode switch assignments: ______________________
6. Pair the DJI video link separately
Confirm the exact O4 air-unit variant and goggles model before changing firmware or choosing accessories. DJI lists Goggles 3, N3, Goggles 2 and Integra for the O4 series; the correct aircraft selection and compatible firmware matter.
Pair the goggles
- With propellers removed, verify the video antenna is attached and undamaged. Power the goggles and select the appropriate O4 Air Unit model in their menu.
- Power the aircraft with its correctly fitted battery. Use a fan and keep the session brief. Follow the linking controls for your particular goggles and air unit.
- Confirm a stable live camera view. Check the on-screen battery information and warnings before flying.
Keep ground low-power mode enabled where appropriate. Provide airflow and stop if the unit overheats; never cover it with the battery or padding.
Video pairing is separate from ELRS binding. A good picture does not verify the control link, and a bound radio does not verify video. DJI manual and downloads: dji.com/o4-air-unit/downloads
7. Motor order, rotation and props
Only perform powered motor checks with every prop removed. Follow the installed firmware's motor-test procedure at low output, briefly, one motor at a time. Verify physical motor positions against the configurator diagram, and actual direction against the configured direction.
This build is configured props-out, meaning the props turn away from the frame. Do not switch it to props-in: change motor direction in the configurator, not by fitting props differently. Confirm the arrangement in the configurator's motors diagram and with a brief props-off test, then match each propeller's pitch and intended rotation to that motor so its leading edge moves outward. Disconnect battery and USB before installing props. Use the appropriate screws and secure mounting; do not guess torque or screw length, and keep screws clear of motor windings.
If the motors behave unexpectedly, stop. Increasing throttle is not a diagnostic method. Motor model and KV are confirmed as HGLRC 1303.5 5500KV, so order replacement motors and propellers against those numbers. Pick props that suit a 2-inch frame and the 5500KV windings, and check clearance before fitting.
8. GPS and failsafe
The M100 GPS is installed, but its presence alone does not establish autonomous return. Outdoors with a clear sky view, check whether GPS data is received and whether the system reports a valid home point before relying on any feature that depends on it.
If Betaflight GPS Rescue is actually configured, verify the installed version's requirements, satellite and home-point acquisition, switch assignment, altitude and behavior with an experienced pilot and the official testing procedure. Do not use the first flight to discover what a rescue switch does, and do not deliberately fly out of radio range to test it.
With props removed, verify the configured failsafe using the installed firmware's procedure. Never remove arming or GPS safeguards simply to make a warning disappear; investigate the cause.
GPS Rescue reference: betaflight.com/docs/wiki/guides/current/GPS-Rescue
9. First flight
Use a clear, suitable outdoor area away from people, animals and obstacles. An experienced pilot should assist if you are unfamiliar with manual FPV. Practice stick control and disarming in a simulator first. Confirm the actual flight modes: Acro does not automatically level when the sticks are released.
Complete the props-off checks first, disconnect all power, fit the verified props, and secure the battery. Confirm the radio model, switches, video and warnings. Keep a safe distance and perform a short, low, controlled hover, ready to disarm.
A 2-inch quad is small, light and quick to drift in wind. Start in calm conditions and stay close, especially with the ceramic-antenna receiver.
If the quad flips, yaws unexpectedly, vibrates severely or sounds wrong, disarm promptly. Disconnect the battery before approaching rotating components or investigating. After landing and disconnecting, inspect for loosened hardware, prop damage, unusual motor or electronics heat and battery movement. Resolve problems before another flight.
10. Quick troubleshooting
No receiver response: with props off, check the correct radio model, ExpressLRS 2.4GHz band and matching major firmware versions, the binding phrase or bind action, and Model Match. Then check the receiver wiring and port configuration. Preserve the original setup.
Video missing: check the identified DJI air unit and goggles compatibility, power, antennas, linking and any activation requirement. Do not assume changing ELRS will fix video.
Will not arm: read the actual arming-disable reason, then check throttle low, arm switch state, receiver link, USB connection and any configured sensor or GPS requirement. Do not disable safeguards blindly.
Flips on takeoff: disarm and disconnect. Recheck motor order, rotation, prop placement and flight-controller orientation. Do not repeatedly try more throttle.
Hot motors or vibration: land, disconnect and inspect props, screws, frame and wiring. Keep the original tune backup and ask the builder before changing filters or PIDs.
No GPS fix: go outdoors under open sky and allow acquisition time. Confirm module communication and wiring with the builder; indoor reception is not a reliable test.
11. Owner checklist
Copy this into your notes and fill it in as you go. Details marked “confirm” are not established by this guide or by the listing photos.
Airframe and electronics Frame: Apex EVO 2-inch AIO: MicoAir H743 Video: DJI O4 Wide Air Unit — exact variant to confirm Receiver: Happymodel EP1 ELRS 2.4GHz, ceramic antenna GPS: M100 Motors: HGLRC 1303.5 5500KV Battery: 3S–4S LiPo — capacity, connector and fit to confirm All-up weight with your pack: ________ g Firmware target and version: ____________________ Configuration backup filename and date: ____________________ ELRS TX / RX versions: ____________________ Goggles and O4 firmware: ____________________ Arm switch / disarmed position: ____________________ Mode switch assignments: ____________________ Props fitted and rotation: ____________________
Keep your configuration backup, radio model file and this guide together with the aircraft. If you sell the Little Monster on, pass them to the next owner.